
It is important that you properly configure your Quickbooks file to backup each and every time you exit Quickbooks for every user account. This ensures that the Quickbooks files are properly backed up and secured on our servers.
Although Pure Technology makes regular backups of our servers, in order to restore changes to your Quickbooks Files, we must have a properly backed up file created by the Quickbooks software. This is also useful in the event of a mistake by yourself or one of your users (i.e. you import a large number of transactions to the wrong account or accidentally delete a customer and all their invoices). Backups allow you to go back to a recent point-in-time within your Quickbooks file.
To Configure Backups in Quickbooks 2016 / 2017:
1. Open your Quickbooks Company File
For detailed instructions on opening your company file, see "How To Connect to Hosted Quickbooks"
2. Once the file is open click FILE --> BACKUP COMPANY --> CREATE LOCAL BACKUP (see figure 1)
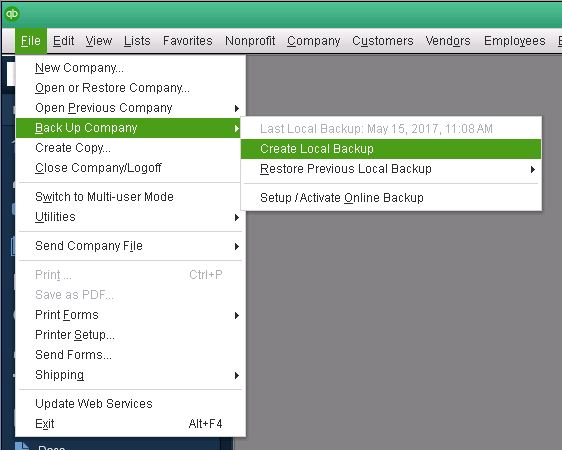
FIGURE 1
3. Click the OPTIONS BUTTON. You should see the following dialog (see figure 2).
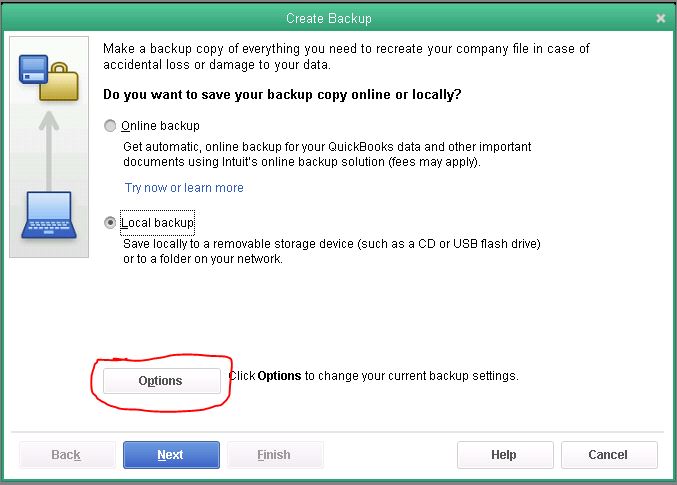
FIGURE 2
4. DO NOT click the BROWSE button to select where you want to put your backup files. Instead, since we limit users from navigating the system, you will need to copy/paste the following path into the file dialog box first:
Copy/Paste this into the file dialog:
D:\Backup\Quickbooks Backup\
5. Once you have copy/pasted the above path, will need to edit it to add the name of {your company folder} to the end of the file path. This will be the same name as the folder where you company files are located under the "Quickbooks Data" folder.
Note: You will not be able to backup files until you have selected a valid company folder.
6. Verify the following values/settings (see figure 3 below):
- CHECK "Add the date and time of the backup to the filename (recommended)
- CHECK "Limit the number of backup copies in this folder to "3"
- CHECK "Remind me to back up when I close my company file every "1" times.
- CHECK "Complete verification (recommended)
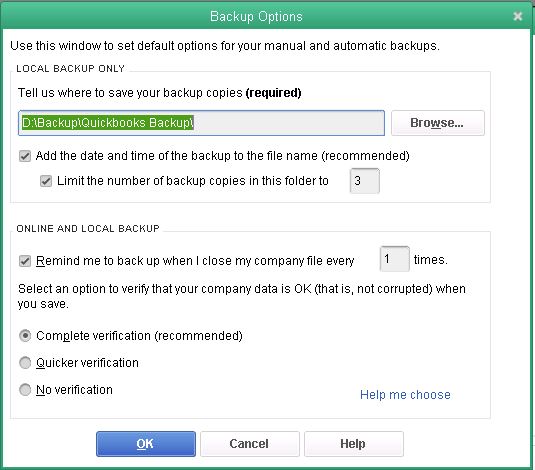
FIGURE 3
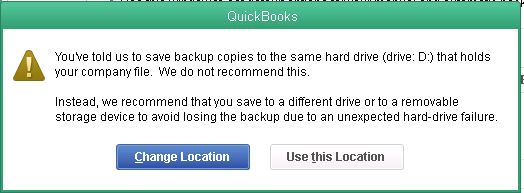
7. When the warning prompt is displayed stating that QuickBooks does not recommend saving backup copies on the same drive that holds your company file, click "Use This Location".
8. Click NEXT
9. Click "Only Schedule Future Backups"
10. Click NEXT
11. CHECK Make sure the "Save backup copy automatically when I close my company file every "1" times
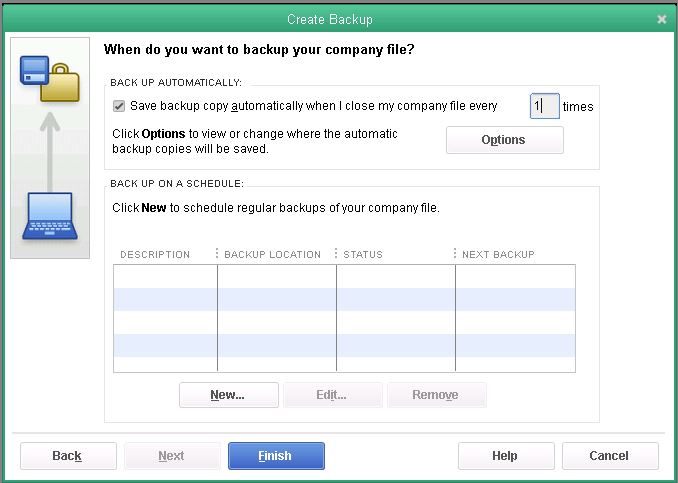
12. Click FINISH
13. Click OK when it says "No backups are currently scheduled."
You are done!
Now Quickbooks should be backing up files each and every time you exit the software.
0 Comments